2021年工作总结
此次二次开发圈子小程序,有一个主包,三个分包,代码量一直处于快溢出阈值的程度。
二次开发通常是基于不动或尽量少的去动原代码开发逻辑,轻易去调整容易崩。
所以整理一下使用的技巧。
判断条件
多个函数执行需要新增相同的判断条件
记录时间:2021年1月
笨方法是创建一个公共条件函数,每个函数中去添加条件函数,需要修改所有的函数,且后续新增需求也要考虑到是否需要条件函数。或者创建前置函数设置条件处理函数,修改所有的函数调用方式,新增函数同样需要考虑是否条件一致。
function foo(a) {
    console.log('a: ', a)
}

// 方法一(推荐)
// function handleClick(fn, ...args) {
//   // ...前置处理逻辑
//   fn && typeof fn === 'function' && fn.apply(this, args)
// }

// 方法二
function handleClick(fn) {
    // ...前置处理逻辑
    fn && typeof fn === 'function' && fn.apply(this, Array.prototype.slice.call(arguments, 1))
}

handleClick(foo, 1)
也可以根据需求,使用事件委托利用事件捕获进行处理。
同一模块下,会先响应最外层的事件捕获 -> 最内层的事件捕获 -> 最内层的事件冒泡 -> 最外层的事件冒泡。
新增处理逻辑
在一串回调中间新增一块处理逻辑
记录时间:2021年2月
逻辑复杂的时候难免跳来跳去使用回调。需求是在中间的一个回调函数中添加一段处理逻辑,所需参数是前几个回调中的数据,可以使用笨办法,一层一层的传递参数,但是这样前面的回调都要修改一层一层向下传值,修改范围太大,且不美观和容易数据丢失和出错。可以使用闭包进行处理。
data = {
    postStatistics: null // 声明
}

onLaunch(options) {
	this.data.postStatistics = this.postStatistics(options) // 保存执行上下文环境
}
// ... 经过一系列请求-回调之后
userLogin (code, tokenCache) {
    circleApi.login({
		// ...
    }).then(res => {
        // ...
        this.data.postStatistics && this.data.postStatistics() // 调用
        // ...
    });
}

postStatistics(options) { // 定义闭包函数
    const opt = options
    const that = this
    return function() {
        const data = {
            app_id: that.globalData.appId,
            scenes: opt.scene,
            wx_info: JSON.stringify(opt.referrerInfo),
            way_id: JSON.stringify(opt.query)
        }
        circleApi.postStatistics({
            data,
            getToken: true
        })
    }
}
添加 WebSocket 相关
记录时间:2021年2月
app.wpy 中统一处理 WebSocket 相关逻辑,全局仅生成一个 SocketTask 对象,方便管理。
使用单例模式。
监听处理逻辑:
handleOpenSocket() { // socket创建新的连接之后后端会关闭掉之前的连接,不区分安卓和ios 统一处理
    const that = this
    const socketTask = that.globalData.socketTask
    const { userPlatform, token } = this.globalData
    if (userPlatform === '' || token === '') return
    const socket = new Socket({
        url: `${wsUrl}?XqCircleToken=${token}`,
        onAcceptMsg(res) {
            // ... 接受到信息处理逻辑
        },
        // 关闭
        onClose(socketTaskId) {
            if (that.globalData.socketTask !== null && socketTaskId === that.globalData.socketTask.socketTaskId) {
                that.globalData.socketTask = null
            }
        }
    })
    that.globalData.socketTask = socket
}
Socket,js
const HEARTBEAT_MSG = '--HEARTBEAT--'
const HEARTBEAT_RATE = 5000

export default class Socket {
    constructor(options) {
        this.heartbeatTimer = null
        this.isOpen = false
        this.heartbeatStatus = false
        this.onOpen = typeof options.onOpen === 'function' ? options.onOpen : this.handleOpen
        this.onClose = typeof options.onClose === 'function' ? options.onClose : this.handleClose
        this.acceptMsg = typeof options.onAcceptMsg === 'function' ? options.onAcceptMsg : this.handleAcceptMsg

        this.init(options.url)
    }

    init(url) {
        if (!url) return
        const that = this
        const socketTask = wx.connectSocket({
            url,
            success(res) {
                that.socketTaskId = res.socketTaskId
            },
            fail(err) {
                console.error(`connectSocket err`, err)
            }
        })
        socketTask.onOpen(() => {
            this.isOpen = true
            this.onOpen()
        })
        socketTask.onMessage(res => {
            if (!res.data.includes(HEARTBEAT_MSG)) {
                this.acceptMsg(res) // 非心跳包
            }
        })
        socketTask.onClose(() => {
            this.handleInit()
            this.onClose(this.socketTaskId)
        })
        socketTask.onError(res => {
            this.handleInit()
            this.onClose(this.socketTaskId)
        })
        this.instance = socketTask
    }

    handleOpen() {
        this.sendHeartbeat()
    }

    handleClose() {
        console.log('handleClose')
    }

    handleInit() {
        this.isOpen = false
        this.instance = null
        this.clearHeartbeat()
    }

    handleCloseConnect() {
        const instance = this.instance
        const that = this
        return new Promise((resolve, reject) => {
            instance && instance.close({
                success(res) {
                    resolve(res)
                },
                fail(err) {
                    reject(err)
                },
                complete() {
                    // 重置
                    that.handleInit()
                    that.onClose()
                }
            })
          })
    }

    handleSendMsg(data) {
        const that = this
        const instance = this.instance
        return new Promise((resolve, reject) => {
            instance && instance.send({
                data: typeof data === 'object' ? JSON.stringify(data) : data,
                success(res) {
                    resolve(res)
                    that.heartbeatStatus = true
                },
                fail(err) {
                    reject(err)
                    that.heartbeatStatus = false
                    that.instance && that.handleCloseConnect()
                }
            })
        })
    }

    handleAcceptMsg(res) {
      console.log('accept msg: ', res)
    }

    sendHeartbeat() {
        this.heartbeatTimer = setTimeout(() => {
            this.handleSendMsg(HEARTBEAT_MSG)
            this.sendHeartbeat()
        }, HEARTBEAT_RATE)
    }

    clearHeartbeat() {
        if (this.heartbeatTimer) {
            clearTimeout(this.heartbeatTimer)
            this.heartbeatTimer = null
        }
    }
}
ASCII正则表达式
记录时间:2021年3月
需求修改,用户自定义输入微信号,需要支持英文字母、数字和英文字符,所以使用ASCII的方式进行正则判断。整理在正则表达式文章中。
export function verifyWxId(wxId) {
  const wxreg=/^[\x21-\x7e]{6,64}$/g; // 自定义规范 英文标点符号
  return wxreg.test(wxId)
}
CSS样式
实现字体渐变
参考链接:
https://segmentfault.com/a/1190000011882933
https://blog.csdn.net/CarsonWoo/article/details/89168346
九宫格处理
动态图片需要九宫格查看
.dynamicWrap {
    margin-bottom: 60rpx;
    width: 654rpx;
    .imagesWrap {
        margin-right: -6rpx;
        display: flex;
        flex-wrap: wrap;
        .dynaminImg {
            margin: 0 6rpx 6rpx 0;
            width: 214rpx;
            height: 214rpx;
            border-radius: 8rpx;
        }
    }
}
view 布局样式
<view class="dynamicWrap">
	<view class="imagesWrap">
        <image
               wx:for="{{ info.photos }}"
               wx:key="*this"
               class="dynaminImg"
               lazy-load="true"
               src="{{ item }}?imageView2/1/w/214/h/214"
               mode="aspectFill"
               @tap.stop="onPreview({{ item }}, {{ info.photos }})"></image>
    </view>
</view>
我总是会陷入图片之间的间距问题,想要图片间距自动实现距离问题使用 justify-content: space-between ,但是会遇到两张图片间距过大的问题,所以不能单纯的使用这个属性进行间距控制。使用 margin-right 是最为保险的使用方式。
实现波纹动效

<view class="recommending">
    <view class="recommendingContent">
        <view class="avatarWrap">
            <open-data type="userAvatarUrl"></open-data>
        </view>
        <view class="recommendRipple">
            <view class="ripple"></view>
            <view class="ripple"></view>
            <view class="ripple"></view>
        </view>
    </view>
</view>
样式
.recommending {
    position: fixed;
    top: 0;
    width: 100%;
    height: 100vh;
    display: flex;
    justify-content: center;
    align-items: center;
    background: #fff;
    z-index: 20;
    .recommendingContent {
        position: relative;
    }
    .avatarWrap {
        width: 200rpx;
        height: 200rpx;
        border-radius: 50%;
        overflow: hidden;
    }
    .recommendRipple {
        position: absolute;
        top: 50%;
        left: 50%;
        display: flex;
        justify-content: center;
        align-items: center;
        border-radius: 50%;
        transform: translate(-50%, -50%);
        overflow: hidden;
        animation: ripple 1000ms step-start 0s infinite;
        .ripple {
            position: absolute;
            width: 240rpx;
            height: 240rpx;
            border-radius: 50%;
            border: 1px solid;
            border-color: rgba(239, 75, 75, 1);
            &:nth-child(1) {
                width: 280rpx;
                height: 280rpx;
                border-color: rgba(239, 75, 75, .6);
            }
            &:nth-child(2) {
                width: 320rpx;
                height: 320rpx;
                border-color: rgba(239, 75, 75, .2);
            }
        }

    }
}
@keyframes ripple {
    0%, 100% {
        width: 220rpx;
        height: 220rpx;
    }
    25% {
        width: 260rpx;
        height: 260rpx;
    }
    50% {
        width: 300rpx;
        height: 300rpx;
    }
    75% {
        width: 340rpx;
        height: 340rpx;
    }
}
小程序踩坑
兼容问题
记录时间:2021-4-8
需要更换getUserInfo的逻辑,换为wx.getUserProfile,但是官方给的兼容例子里,低版本微信也可以成功调用wx.getUserProfile,但是缺少必要的加解密信息,所以低版本也是支持wx.getUserProfile但是功能不完善,所以判断当前版本是否能使用具体某个功能时需要使用wx.canIUse()进行判断,如果使用常用浏览器判断是否支持某个特定api的方法是会触发异常bug。
背景图片
记录时间:2021-4-21
小程序不支持静态背景图片,主要是路径名会变,所以即使在开发工具中没有问题,可能会在真机测试出现问题。
所以使用动态链接 url 进行设置背景图片。
设置 background-image 没有作用,只能设置 background,相应的 background-size 也是没有作用的。
background 简写属性:background-clip、background-color、background-image、background-origin、background-position、background-repeat、background-size 、background-attachment
- 在每一层中,下列的值可以出现 0 次或 1 次:
<attachment><bg-image><position><bg-size><repeat-style>
<bg-size>只能紧接着<position>出现,以”/“分割,如: “center/80%“.<box>可能出现 0 次、1 次或 2 次。如果出现 1 次,它同时设定background-origin和background-clip。如果出现 2 次,第一次的出现设置background-origin,第二次的出现设置background-clip。<background-color>只能被包含在最后一层。
动画
记录时间:2021-4-27
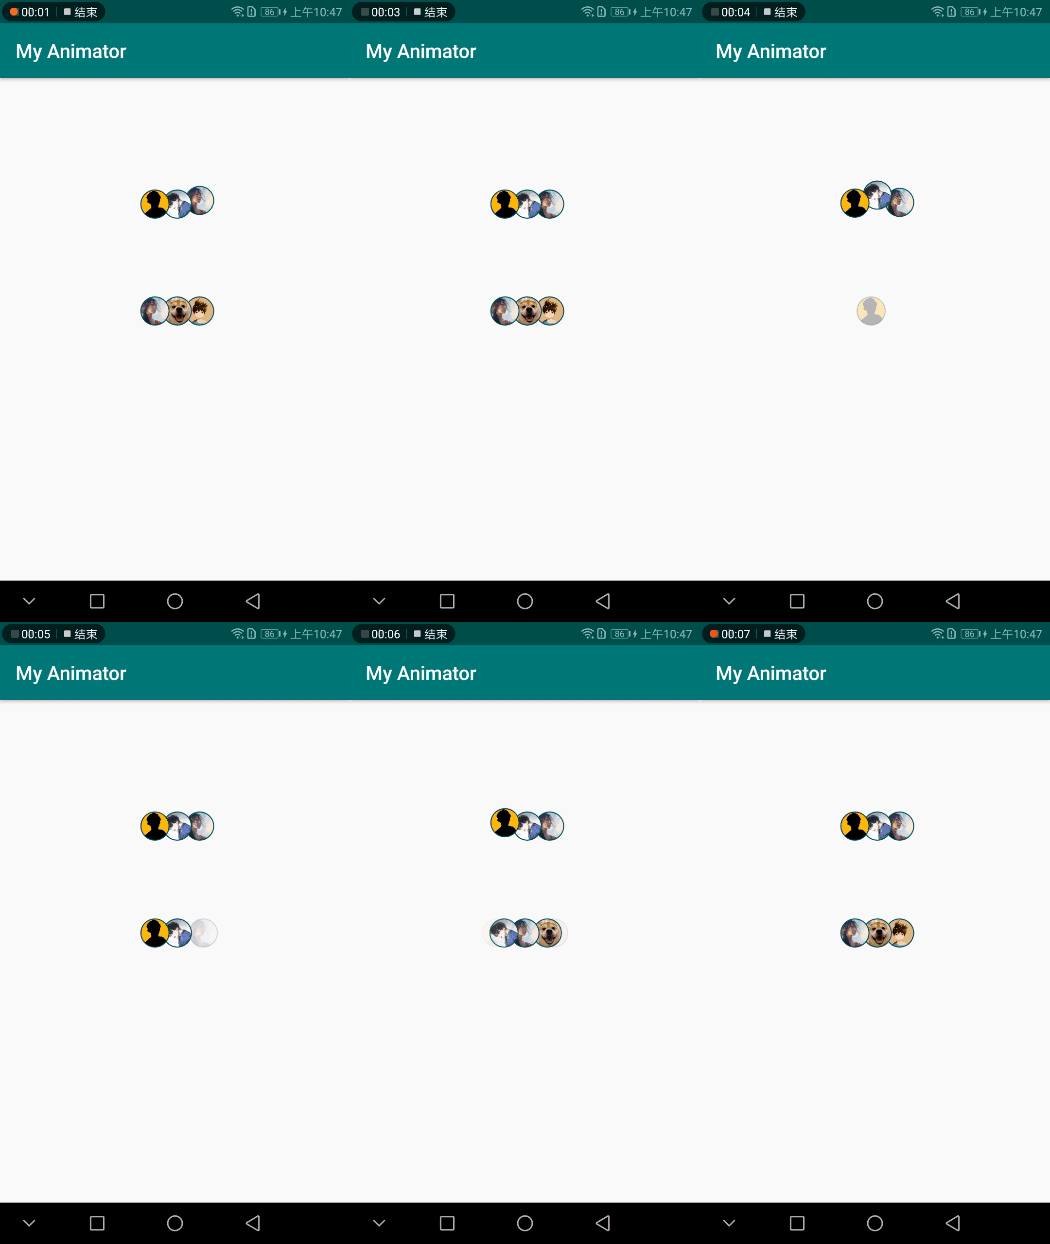
需求想要实现动画第二种效果:参考链接 - Android:仿“某音”APP 多头像跳动动画+轮播动画+心跳动画+输入框抖动动画

对于实现想法:
-
如果仅仅使用 CSS 动画帧:
- 如果第一个元素进入在容器最左侧,第一个元素消失时第二个元素和第三个元素前移,第四个元素进入,如何控制第二个元素和第三个元素的移动位置。(目前想法,设置三种动画帧,设置延时时间)
- 如果第一个元素和第四个元素效果一样,则可以不用考虑第二个元素和第三个元素迁移的动画帧和距离。
- 面临如何循环显示问题。
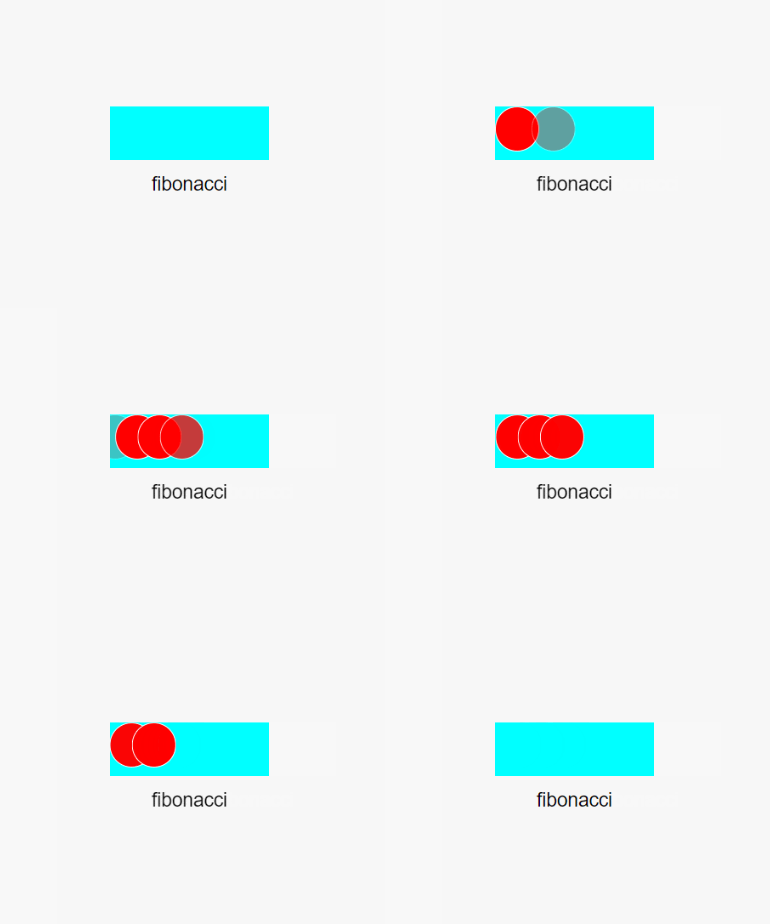
采用了第一种方法
wxml
<view class="container">
  <view class="content" bind:tap="onStartAnimation">
    <view id="item_{{ item }}"
      wx:for="{{ itemList }}" wx:key="item"
      class="item {{ index < 2 ? 'fade' + index : 'fade2' }}"
      style="animation-delay: {{ (index + 1) * 500 }}ms"
    ></view>
  </view>
  <button bind:tap="onClick">fibonacci</button>
</view>
wxss
.container {
  height: 100vh;
  width: 100vw;
  display: flex;
  justify-content: center;
  align-items: center;
}
.content {
  position: relative;
  height: 100rpx;
  width: 300rpx;
  background-color: aqua;
  overflow: hidden;
}
.item {
  position: absolute;
  left: 0;
  top: 0;
  height: 80rpx;
  width: 80rpx;
  border-radius: 50%;
  border: 1px solid #fff;
  background: red;
  opacity: 0;
}

.fade0 {
  animation-name: fadeFirst;
  animation-duration: 2000ms;
  animation-fill-mode: both;
  animation-delay: 500ms;
}
.fade1 {
  animation-name: fadeSecond;
  animation-duration: 2000ms;
  animation-fill-mode: both;
  animation-delay: 1000ms;
}
.fade2 {
  animation-name: fadeThird;
  animation-duration: 2000ms;
  animation-fill-mode: both;
  animation-delay: 1500ms;
}
/* 500ms 时到达边缘位置 1500ms时c出现 a开始消失和移动 */

@keyframes fadeFirst {
  0% {
    opacity: 0;
    transform: translateX(50%);
  }

  25%, 75% {
    opacity: 1;
    transform: none;
  }

  100% {
    opacity: 0;
    transform: translateX(-50%);
  }
}

@keyframes fadeSecond {
  0% {
    opacity: 0;
    transform: translateX(100%);
  }

  25%, 50% {
    opacity: 1;
    transform: translateX(50%);
  }

  75% {
    opacity: 1;
    transform: translateX(0);
  }

  100% {
    opacity: 0;
    transform: translateX(-50%);
  }
}

@keyframes fadeThird {
  0% {
    opacity: 0;
    transform: translateX(150%);
  }

  25% {
    opacity: 1;
    transform: translateX(100%);
  }

  50% {
    opacity: 1;
    transform: translateX(50%);
  }

  75% {
    opacity: 1;
    transform: translateX(0);
  }

  100% {
    opacity: 0;
    transform: translateX(-50%);
  }
}
最后实现效果

对于每个已显示的头像使用 setTimeout 进行设置每个时间段的动画(会有卡顿不圆滑)
微信小程序的关键帧动画
将每个元素动态绑定动画,但是没有延时设置,所以手动 setTimeout 挂载动画实现,由于是单线程的,如在进行动画的时候点击运行斐波那契数列,就会出现动画卡住的问题。
实现延时绑定的方法参考链接:每隔 1s 输出一个结果
const { log } = console
const delay = (context, fn, params) => {
  return new Promise((resolve, reject) => {
    setTimeout(() => {
      console.log('delay')
      fn.call(context, params)
      resolve(params)
    }, 1000)
  })
}
Page({
  data: {
    itemList: [1, 2, 3, 4, 5, 6],
  },
  onLoad: function (options) {
    const list = this.data.itemList
    const that = this
    function setDelay(i = 0, promise = Promise.resolve()) {
      if (i > list.length) return
      promise = promise.then(res => {
        console.log(res)
        return delay(that, that.animation, `item_${i}`)
      })
      setDelay(i + 1, promise)
    }
    setDelay()
  },
  animation(id) {
    this.animate(`#${id}`, [
      { opacity: 0, translateX: 40},
      { opacity: 1, translateX: 0},
      { opacity: 0, translateX: -40},
    ], 5000)
  },
  transitionend() {
    // log('transitionend')
  }
})
小程序对async、await支持度不高
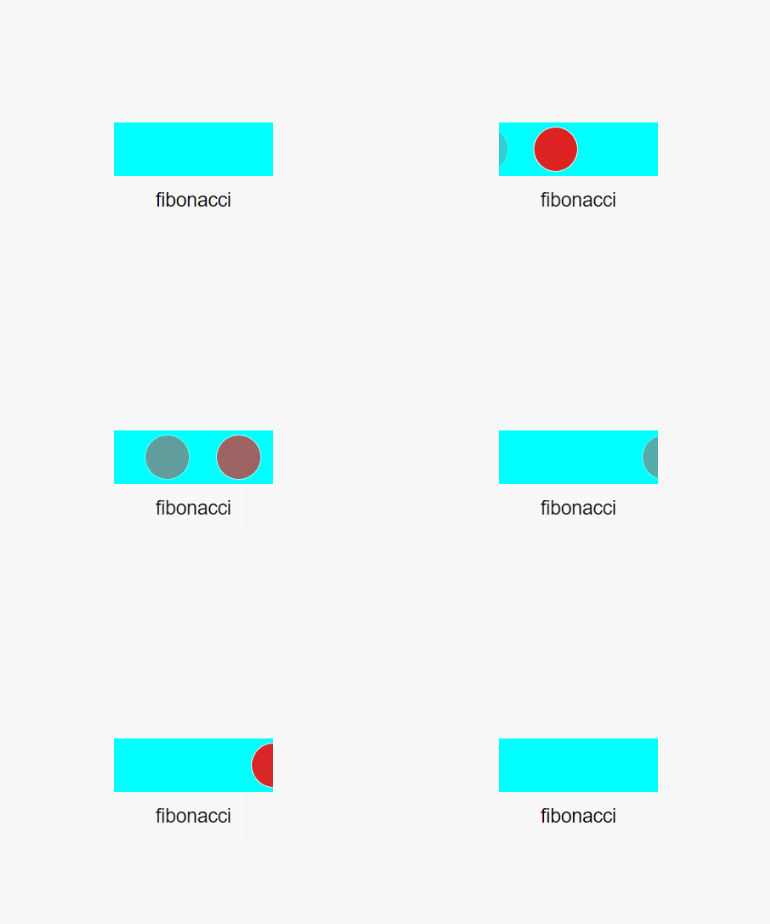
以上代码实现效果:

动画卡住问题:运行一段时间之后点击运行斐波那契数列,运行结束后才继续执行。

最后使用 CSS 动画的样式实现,运行 Fibonacci 函数时不会发生卡顿现象。
最后和产品沟通 最终实现效果是 简单的滑动

这种比较简单,使用了两个重复数组进行拼接,会在动画的结尾回到头部,但是不会给人明显的跳动感
样式部分:
@avatarWidth: 48rpx;
@avatarSpace: -18rpx;
@avatarItem: 10;

@startPos: -50rpx;
@endPos: @startPos - @avatarItem * (@avatarWidth + @avatarSpace);
.avatarList {
    margin-right: 12rpx;
    height: 48rpx;
    width: 108rpx;
    overflow: hidden;
}
.listWrap {
    display: flex;
    align-items: center;
}

.move {
    animation: 5s move infinite linear;
}

.avatarItem {
    flex-shrink: 0;
    margin-right: @avatarSpace;
    height: @avatarWidth;
    width: @avatarWidth;
    background: #eee;
    border: 1px solid #fff;
    border-radius: 50%;
    box-sizing: border-box;
    overflow: hidden;
    .avatar {
        height: @avatarWidth;
        width: @avatarWidth;
    }
}
@keyframes move {
  0% {
    transform: translateX(@startPos);
  }

  100% {
    transform: translateX(@endPos);
  }
}
布局部分:
<view class="avatarList">
    <view class="listWrap {{ isCurrent ? 'move' : '' }}">
        <view class="avatarItem" wx:for="{{ info.members }}" wx:key="index">
            <image class="avatar" lazy-load="true" mode="aspectFill" src="{{ item }}?imageView2/1/w/20/h/20"></image>
        </view>
        <view class="avatarItem" wx:for="{{ info.members }}" wx:key="*this">
            <image class="avatar" lazy-load="true" mode="aspectFill" src="{{ item }}?imageView2/1/w/20/h/20"></image>
        </view>
    </view>
</view>
swiper踩坑
记录时间:2021-5-26
swiper 如果使用动态加载的方式,如果重新设置已经渲染的列表,会打乱swiper内部顺序。需要保证前面加载过的item不能被挪掉否则swiper内部可能会错乱。
社区中类似问题:
动态改变渲染swiper-item的数组时出现current为-1的情况
【必现】动态修改 swiper-item bug:添加 swiper-item 当前页面变空白
current变为-1问题,使用开关控制显隐强制重新渲染,解决问题。
动态加载更换当前页面内容变为空白时,改变 currentIndex 为有效位后再进行移动。
会滑动到列表中的某一位置,而不是指定位置。
业务逻辑会判断当前需要过滤的列表内容是否包含首位数据项。
特殊情况,过滤项包含当前显示项和首位数据项,则要先滑动到有效位(即未过滤数据项)后,再更新列表数据,滑动到第一项。
如果过滤项不包含首位数据项可以直接手动滑动到第一项,再更新列表,如果包含则不能直接滑动到第一项,否则会同样出现空白问题,需要先更新列表后滑动到第一项。
动态加载问题总结:
整个列表全换
只减少部分列表内容
- 减少部分是否包含首位数据项
- 减少部分是否包含当前加载数据项 且 包含首位数据项
- 其他情况
const { data, errcode, circle_data = [], is_all_buy } = res.data
const firstId = circle_data[0].id
const originCircleLen = this.circleList.length
const newCircleLen = circle_data.length
this.customData.currentItemId = firstId
// 初始加载
if (originCircleLen === 0) {
    this.circleList = circle_data
    this.circlePurchaseStatus = !!is_all_buy
    this.$apply()
    this.getRecommend(firstId)
    return
}

// 判断是否买了新圈子
const currentCircles = circle_data.map(item => item.id)
// 判断之前的圈子列表和新的列表是否有出入
const filterIds = []
const filters = this.circleList.filter((item, index) => {
    if (!currentCircles.includes(item.id)) {
        filterIds.push(index)
        return true
    }
    return false
})
const filterFirst = filterIds.includes(0)
this.circlePurchaseStatus = !!is_all_buy
// 没有买圈子 全买 与全未购之间也无差别 仅修改性别 不修改地区 无差别
if (filters.length === 0 &&
    !this.circlePurchaseStatus &&
    !refresh &&
    originCircleLen === newCircleLen) {
    return
}
let timer = null
const changeFullCircle = filterIds.length === originCircleLen // 过滤更换圈子和旧圈子列表长度相等 可能是换整个圈子列表
// 换地区 换整个圈子: 如果没有滑动 走初始先置 如果已经滑动
if (changeFullCircle && this.customData.hasSwitchSwiper) {
    this.showSwiper = false
    this.currentItemIndex = 0
    this.circleList = circle_data
    this.$apply()
    timer = setTimeout(() => {
        this.showSwiper = true
        this.$apply()
        this.getRecommend(firstId)
    })
    return
}
// 特殊情况:过滤列表包含当前滑动位 不是全部换圈子 还是同一个地区列表
if (filterFirst && filterIds.includes(this.currentItemIndex) && !changeFullCircle) {
    // 找到一个不等于 currentItemIndex 且有效的位置 不是连续的前三位 不是连续的后三位
    let validIndex = filterIds.pop()
    let lastIndex = originCircleLen - 1
    // 等于最后一个位置 从后往前找 找到有效位
    validIndex = validIndex === lastIndex ? findBackValid(filterIds, lastIndex, validIndex, validIndex) : validIndex + 1
    this.currentItemIndex = validIndex
    this.$apply()
}
// 过滤列表包含第一个圈子 初始先置
if (filterFirst) {
    // 如果买的是第一个圈子 则不能先置index
    this.circleList = circle_data
    this.$apply()
    timer = setTimeout(() => {
        timer = null
        // 特殊情况下没有用 小程序会自动再置回特殊情况位
        this.currentItemIndex = 0
        this.$apply()
        this.getRecommend(firstId)
    })
    return
}
// 其他情况 refresh
this.currentItemIndex = 0
this.$apply()
timer = setTimeout(() => {
    timer = null
    this.circleList = circle_data
    this.$apply()
    this.getRecommend(firstId)
})


// =============================
/**
 * 从后向前找有效位
 * @param {Number[]} list
 * @param {Number} last
 * @param {Number} previous
 * @param {Number} current
 * @returns
 */
export function findBackValid(list, last, previous, current = previous) {
  // 如果当前的index 等于最后一个 往前找
  if (current === last) {
      previous = current // 保存当前值
      current = list.pop()
      last -= 1
      return findBackValid(last, previous, current)
  }
  // 当前的index 不等于最后一个index 判断和上一个是否是连续的index
  const next = previous - 1
  if (next === current) {
      // 是连续的index 返回最前面的index
      return next - 1
  }
  // 不是连续的index 就返回中间的
  return next
}
粗暴的解决方案:
// 直接控制显隐问题
let timer = null
this.showSwiper = false
this.currentItemIndex = 0
this.circleList = circle_data
this.$apply()
timer = setTimeout(() => {
    this.showSwiper = true
    this.$apply()
    this.getRecommend(firstId)
    timer = null
})
swiper 其他相关问题
答案记录:
微信小程序答题页——swiper渲染优化及swiper分页实现
web-view 缓存问题
记录时间:2021-5-27
image 自适应高度
记录时间:2021-6-8
style 设置 width: 100%
image 标签 mode="widthFix"
IOS 时间处理兼容
记录时间:2021-6-30
IOS 中将 String 转换成 Date 类型时需要注意 String 的格式
// 兼容 ios 无法识别 yyyy-MM-dd hh:mm:ss 格式 需要转换成 yyyy/MM/dd hh:mm:ss 或 yyyy-MM-ddThh:mm:ss
let serverTime = '2021-06-30 17:12:23' // || Date.now()
typeof serverTime === 'string' && (serverTime = serverTime.replace(' ', 'T'))
// 或
// typeof serverTime === 'string' && (serverTime = serverTime.replace(/-/g, '/'))
音频播放
记录时间:2021-7-23
iOS 静音模式下,如果不进行特殊的设置,在有音量的情况下无法播放出声音,需要使用 wx.setInnerAudioOption(Object object) API 进行全局设置。
如果在相同的音频地址下,重复设置地址不是重新播放而是继续播放。
Android 环境下,如果正在播放第一条音频,再点开第二条音频,即使重新设置了音频对象的src,但会出现两条音频同时播放的情况,所以需要手动 stop 之后再设置 src 进行 play。
无限列表
记录时间:2021-7-23
需求是页面实现一个列表,但是产品没有限制列表长度,导致刷到34页(20条/页)时,爆栈了。
小程序社区官方回复页面可以存在 16000 个节点,如果页面过于复杂则需要删减。
如果限制了页码长度(趋于极限位),刷到极限页面,再在页面上做操作时会非常的卡顿,所以利用滑动窗口原理实现一个无限列表,仅维持页面上的2页(40条)数据。
至于为什么是2页数据,是为了下滑/上滑加载新的一页时,当前屏显示的数据仍保持在原位,加载完成后,用户可以继续往下滑查看数据,有更好的交互体验。可以大于2页,但是需要根据当前页面的复杂程度,页面节点越多页面性能越差。
Android 和 iOS 的表现差异在于,iOS有回弹机制,而 Android 则需要手动定位。但是在 wepy 框架和原生小程序中表现不一致,不确定是否是页面结构的问题。
实现方案:分页加载 + 分页显示
项目截图效果和实验截图效果:


项目中使用的是 wepy 1.7.x 写的,子组件中监听 scroll-view 的 scrolltoupper 事件和 scrolltolower 事件,并向父组件进行派发,父组件进一步处理响应事件。
父组件中的相关逻辑:
框架编译后有个问题就是无法关闭 iOS 的回弹效果,因此会在一段时间内持续触发 scrolltoupper 事件和 scrolltolower 事件 ,如果不设置时间间隔,设置好的滚动位会被回弹重新设置到顶部位置。
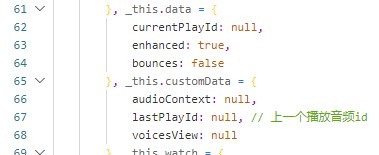
无法关闭 iOS 的回弹效果:微信小程序中的文档属性设置也都设置正确(真机打开调试模式查看 WXML 文档结构上组件的属性,加以验证),也增加了 ScrollViewContext 的 bounces 控制,但是依旧不生效,可能和页面结构有关,没有深究。
customData = {
    voiceCurrentPage: 1,
    tempVoiceList: [],
    isAllVoice: false,          // 已经加载完所有的voice list
    waitBounceTime: 1000,       // 处理 ios回弹问题
    voiceScrollNode: null,      // scroll 节点
}

onReady() {
    wx.createSelectorQuery()
        .select('#voicesView').node()
        .exec(res => {
        const scrollView = res[0].node
        console.log(scrollView)
        this.customData.voiceScrollNode = scrollView
        scrollView.bounces = false
    })
}

// =================== 核心代码部分 ===============================
// 上一页
handlePrevPage(scrollTop) {
    // TODO
    if (this.customData.isVoiceLoading) {
        return
    }
    console.log('handlePrevPage')
    const { voiceCurrentPage, tempVoiceList, voiceScrollNode } = this.customData
    const len = tempVoiceList.length
    if (len < 3 || voiceCurrentPage < 3) {
        return
    }
    console.log('handlePrevPage before: ', voiceCurrentPage)
    this.customData.isVoiceLoading = true
    wx.showLoading({
        title: '上一页',
        mask: true,
    })
    voiceScrollNode.scrollEnabled = false
    // 窗口滑动
    let timer1 = setTimeout(() => {
        let list = this.voiceList.slice(0, 20) // 当前列表第一页数据
        const viewId = `item_${ list[0].id }`
        list.unshift(...tempVoiceList[voiceCurrentPage - 2 - 1]) // 数组的index 要比页数少一
        this.voiceList = list
        this.customData.voiceCurrentPage = voiceCurrentPage - 1
        this.$apply()
        console.log('handlePrevPage after: ', this.customData.voiceCurrentPage)
        let timer2 = setTimeout(() => {
            this.voiceViewId = viewId
            this.$apply()
            timer2 = null
            this.customData.isVoiceLoading = false
            wx.hideLoading()
            voiceScrollNode.scrollEnabled = true
        })
        timer1 = null
    }, this.customData.waitBounceTime)
}

// 下一页
handleNextPage() {
    // TODO
    const { voiceCurrentPage, tempVoiceList, voiceScrollNode } = this.customData
    if (voiceCurrentPage === tempVoiceList.length) {
        console.log('handleNextPage new', voiceCurrentPage, tempVoiceList.length)
        // 获取下一页数据
        this.getVoiceList(voiceCurrentPage + 1)
    } else {
        console.log('handleNextPage old before', voiceCurrentPage, tempVoiceList.length)
        if (this.customData.isVoiceLoading) {
            return
        }
        this.customData.isVoiceLoading = true
        wx.showLoading({
            title: '下一页',
            mask: true,
        })
        voiceScrollNode.scrollEnabled = false
        let timer = setTimeout(() => {
            // 窗口滑动
            let list = this.voiceList.slice(-20)
            list = list.concat(tempVoiceList[voiceCurrentPage]) // 最后一页数据 + 数组的index 要比页数少一
            this.voiceList = list
            this.customData.voiceCurrentPage = voiceCurrentPage + 1
            this.$apply()
            console.log('handleNextPage old after', this.customData.voiceCurrentPage)

            this.customData.isVoiceLoading = false
            wx.hideLoading()
            voiceScrollNode.scrollEnabled = true
            timer = null
        }, this.customData.waitBounceTime)
    }
}

// 获取新数据
getVoiceList(page) {
    if (this.customData.isVoiceLoading || this.customData.isAllVoice) {
        return
    }
    this.customData.isVoiceLoading = true
    this.$apply()
    this.loading()
    Promise.all([
        circleApi.getRecommendVoice({
            data: {
                page
            },
            getToken: true
        }),
        new Promise((resolve) => {
            setTimeout(() => {
                resolve()
            }, this.customData.waitBounceTime)
        })
    ]).then(res => {
        const { errcode, data } = res[0].data
        if (errcode !== 0) {
            return
        }
        const { user_list, man_mask_list, woman_mask_list } = data
        if (user_list.length > 0) {
            // 缓存新数据
            this.customData.tempVoiceList.push(user_list)

            this.voiceList = this.voiceList.slice(-20).concat(user_list)

            this.customData.voiceCurrentPage = page
            console.log('voiceCurrentPage: ', page)

        } else {
            this.customData.isAllVoice = true
        }
        this.customData.isVoiceLoading = false
        this.$apply()
        this.hideLoading()
    }).catch((err) => {
        this.customData.isVoiceLoading = false
        this.hideLoading()
    })
}
实验代码:
实验代码会和实际项目有差异,原因在于实验小程序成功取消了 iOS 的回弹效果。
<!-- WXML -->
<view class="container">
    <scroll-view
                 id="scrollView"
                 class="scrollView"
                 scroll-y="true"
                 scroll-anchoring
                 enhanced="{{ true }}"
                 bounces="{{ false }}"
                 scroll-into-view="{{ toView }}"
                 bindscrolltoupper="upper"
                 bindscrolltolower="lower">
        <view wx:for="{{ itemList }}" wx:key="item" id="item_{{ item }}" class="scroll-view-item">
            {{ item }}
        </view>
    </scroll-view>
</view>
/* WXSS */
.scrollView {
width: 100%;
height: 100vh;
}
.scroll-view-item{
height: 300rpx;
line-height: 300rpx;
text-align: center;
font-size: 48rpx;
font-weight: bold;
}
.scroll-view-item:nth-child(odd) {
background-color: beige;
}
.scroll-view-item:nth-child(even) {
background-color: bisque;
}function more(start) {
const list = []
for (let i = start; i < start + 20; i++) {
list.push(i)
}
return list
}
Page({
data: {
toView: '',
itemList: [],
},
customData: {
tempList: [],
currentPage: 0,
loading: false,
scrollView: null,
itemNum: 0,
},
onLoad() {
const list = more(0)
this.customData.tempList.push(list)
this.setData({
itemList: list
})
},
onReady() {
const query = wx.createSelectorQuery()
query.select('#scrollView').node()
query.select('#scrollView').boundingClientRect()
query.select('.scroll-view-item').boundingClientRect()
query.exec(res => {
const scrollView = res[0].node
scrollView.bounces = false
this.customData.itemNum = Math.floor(res[1].height / res[2].height)
console.log(this.customData.itemNum)
})
},
upper() {
if (this.customData.loading) {
return
}
this.customData.loading = true
this.promiseTimeout().then(() => {
this.prevItems()
this.customData.loading = false
})
},
lower() {
if (this.customData.loading) {
return
}
this.customData.loading = true
this.promiseTimeout().then(() => {
this.nextItems()
this.customData.loading = false
})
},
prevItems() {
const { tempList, currentPage } = this.customData
let list = this.data.itemList
this.customData.currentPage = currentPage - 1
if (tempList.len < 2 || currentPage < 2) {
return
}
list = list.slice(0, 20)
const itemId = `item_${list[0]}`
list.unshift(...tempList[currentPage - 2])
this.setData({
itemList: list
}, () => {
this.setData({
toView: itemId
})
})
},
nextItems() {
const { tempList, currentPage, itemNum } = this.customData
const len = tempList.length
let list = this.data.itemList
this.customData.currentPage = currentPage + 1
list = list.slice(-20)
const itemId = `item_${list[list.length - 1 - itemNum]}`
if (currentPage === len - 1) {
const newList = more((currentPage + 1) * 20)
this.customData.tempList.push(newList)
list = list.concat(newList)
this.setData({
itemList: list
}, () => {
this.setData({
toView: itemId
})
})
} else {
list = list.concat(tempList[currentPage + 1])
this.setData({
itemList: list
}, () => {
this.setData({
toView: itemId
})
})
}
},
promiseTimeout(time = 0) {
return new Promise((resolve, reject) => {
let timer = setTimeout(() => {
resolve()
timer = null
}, time)
})
}
})脱离小程序平台,可以使用虚拟 DOM 的方式进行实践,补充更多阅读的文章:https://juejin.cn/post/6995334008603148295
wepy 1.7.X 踩坑
repeat
坑记录:https://github.com/Tencent/wepy/issues/1549
关于 swiper
如果使用 repeat组件进行循环包裹 swiper-item 原生组件中使用的自定义组件,则向自定义组件传入的值无法进行隔离,接收的 prop 除渲染在 view 上的数据,其他数据则一直为首个数据项,如果需要传值,则需要将数据保存在 data-* 上,或方法定义传值。
关于watch
普通组件中可以使用watch属性,被repeat包裹的组件就无法进行watch
关于循环组件中的data 状态切换
状态切换不是单一的,会影响到整个 repeat 渲染列表。
事件相关
组件自定义事件,只能绑定自定义事件名
组件捕获,外部页面捕获能够截断组件内部捕获,同名 capture。
注意 加上阻止事件冒泡 capture-catch(
@tap.capture.stop)
父子组件事件捕获是用的同一个链上的,如果同名,会响应父组件定义的事件捕获。
最后的解决方法是用遮罩。
wepy v1.7.* 中的写法 @tap="onAvatar({{ item.user_id }})" 编译后会拆成两部分,传入的参数和调用的函数,所以后续新增的方法没有做兼容旧不能使用 wepy v1.7.* 中事件传入参数的方式。
组件
记录时间:2021-7-23
子组件绑定到小程序组件上的属性值必须要通过 data 定义的方式进行传递,否则编译后,会找不到数据。
编译前的开发代码

编译后的 page 页面中的代码,会直接将组件嵌入到页面中。

wepy 出现的时候小程序不支持组件化开发,所以 wepy 低版本中是将组件中的 html 直接嵌入到 page 中。
编译前后的子组件数据。


组件中定义属性错误的使用方式示例:


子组件中并没有定义 变量名为 true / false 的变量,取不到时则为 undefined, 所以设置的属性并不生效。
数据更新
记录时间:2021-8-9
自定义数据 customData 在页面销毁后仍然保存在内存中,下次创建页面时仍然上上一次遗留的数据,而 data 就不会。
工作问题总结
总是会觉得自己没有认真的做事,负责任的做事,出了事情就陷入无限自责,但是仍然不知悔改下次继续再犯,就像惯犯说的,只有无限次和零的区别。
每次都会生气,生同事的气,生自己的气,生自己之前错怪同事的气,开始陷入无限的自怨自艾中,开启自暴自弃,放弃学习,放弃积极向上的想法。人生失败是常事,但是不能掉入坑中顺势躺平了,觉得现在这样也挺好,慢慢的会变成井底之蛙,丧失了竞争力和积极性,人生的意义大打折扣。
希望每次我做错事情之后能够反思并且牢记下次不再犯。
5月问题记录
记录时间:2021-5-28
promise await
promise reject 错误抛出后使用 await 没有处理 reject 抛出的错误,await 只接受 resolve 正确返回,所以要使用 try … catch … 的方式处理 await 的错误。
问题处理过于复杂化
总是会在 wepy 框架的坑中常住,每次开发都会光顾同样的坑。
对于特殊问题需要进行特殊方式处理。
以全页点击进行获取用户授权信息为例,之前的做法是使用组件页面内容作为组件的slot,组件内部根据用户授权状态判断是否使用button进行包裹,结果最简单粗暴的方法就是直接全页覆盖一个 button 的遮罩,如果用户已经授权就隐藏遮罩,简单直接,不需要组件包裹。
这种做法是不符合逻辑的嘛?不是,只是更加的简单有效,就像解一道数学题一样,传统解法和另辟蹊径的解法结果都是一样的。然而传统解法需要考虑很多东西,另辟蹊径的解法简单粗暴,当然优劣因实际情况而异,上述问题应该使用简单粗暴的解法。
学的多容易进入化简为繁的死胡同,适时跳出来未尝不可。
过度在乎性能问题!
对于性能损耗问题是在于能够完全解决问题的基础上再考虑的事情!
偷懒
总是做完不喜欢自测,然后直接将问题抛给测试,让测试推动开发,这种习惯很不好,所以需要端正工作态度,如果问题过多抛给他人解决,反而会浪费更多的时间。